Welcome to the user guide for uploading images in bulk for your products. In this guide, we’ll walk you through the process step by step, offering two methods for your convenience.
1. Access Easy Populate Page
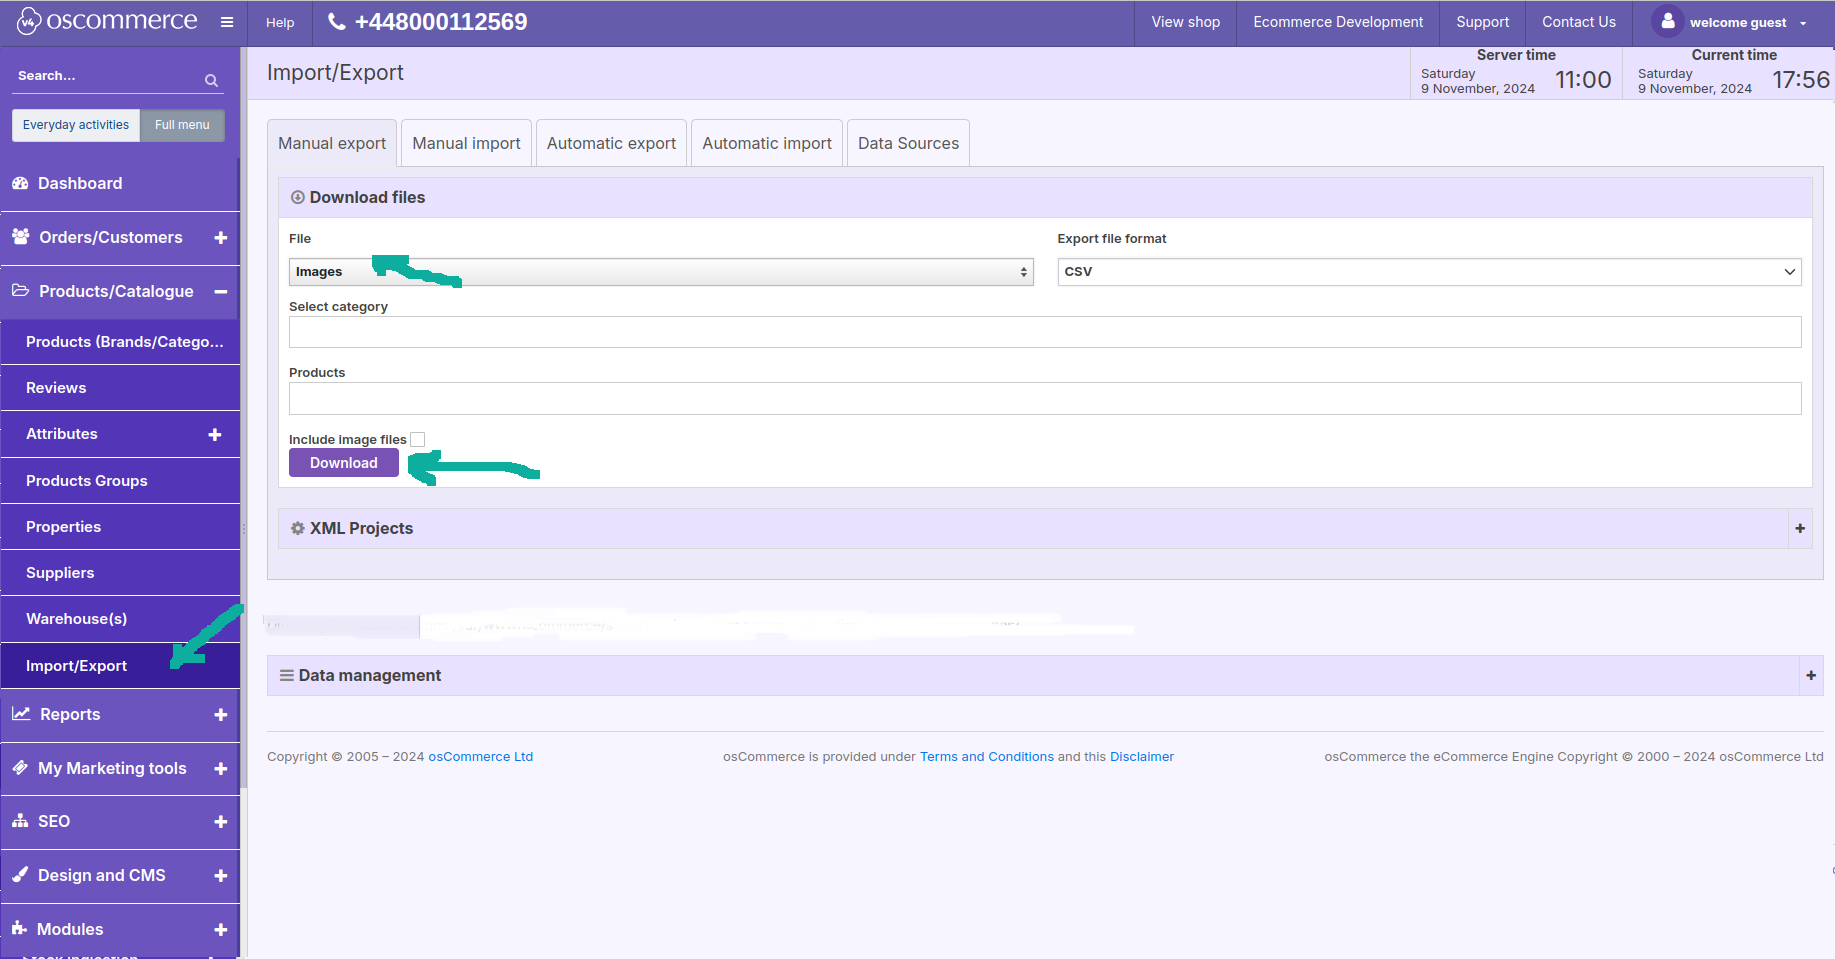
Firstly, open the Easy Populate page using the following link: https://www.your_web_site.com/admin/easypopulate
2. Select Image Options
Once on the Easy Populate page:
- Choose “Images” from “File” field.
- Click the “Download” button. You can also specify the category in the “Select category” field if needed.

. Customize Image Fields
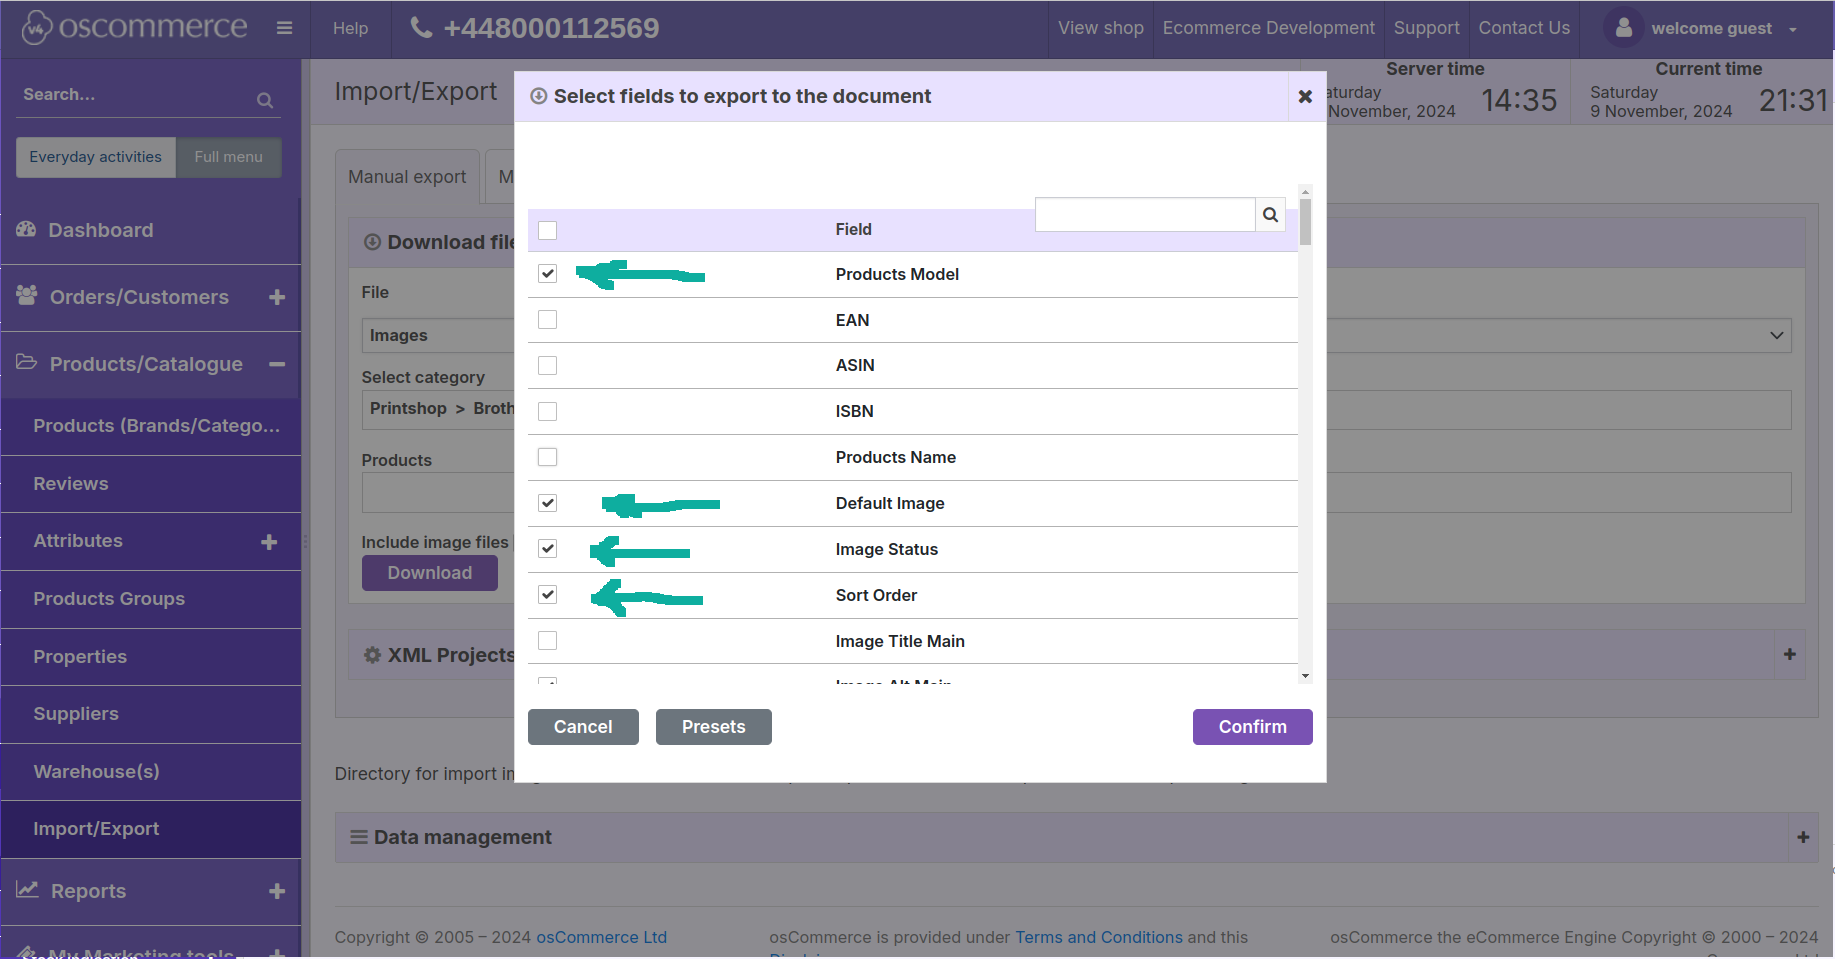
In the pop-up window, select the following fields:
- Products Model
- Default Image
- Image Status
- Sort Order
- Original filename Main
Then, click “Confirm”.

4. Optional: Assign Images to Specific Attributes
If required, you can also choose additional options under “Assign…” in the pop-up window.
5. Fill in Image Details
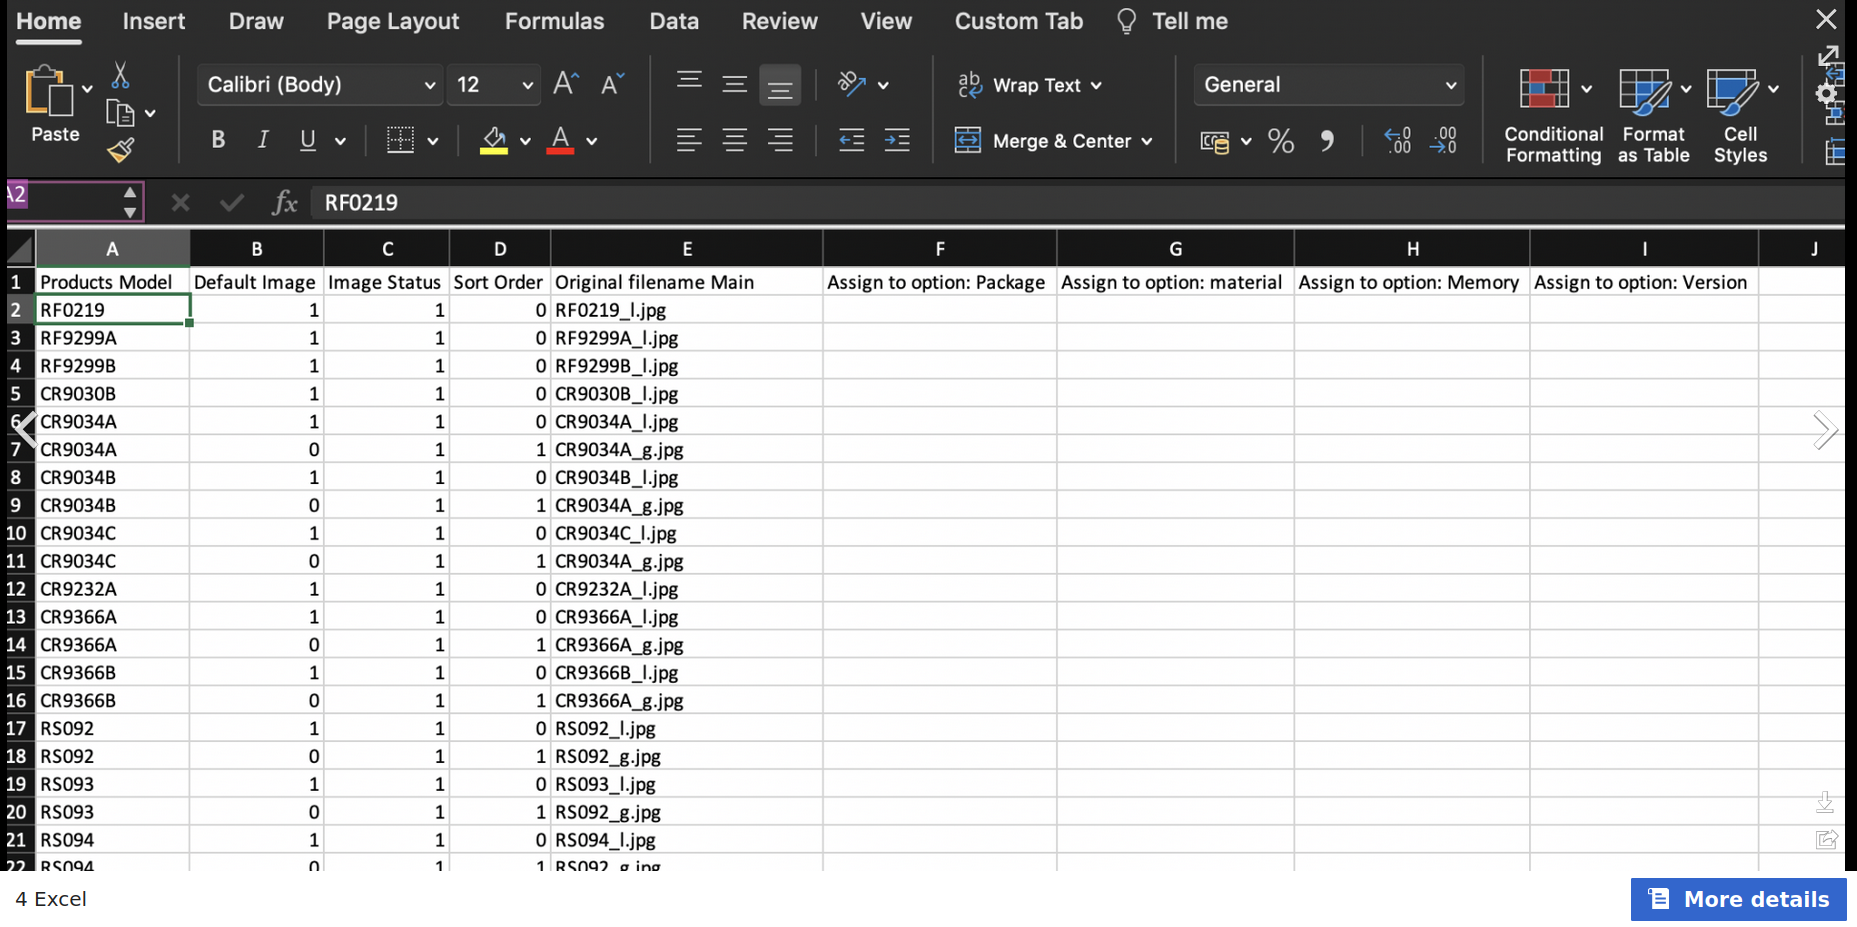
After downloading the file, open it in Excel or Libre/Open Office and fill in the following columns:
- Products Model – model of the product where images need to be uploaded. If you need to upload more than one image per product, you need to copy this row several times with the same product model, but different image file name.
- Default Image – enter 1 for default image and 0 for all other images (not default) per product.
- Image Status – enter 1 for enabled and 0 for disabled (not visible) image per product.
- Sort Order – enter number of images to sort them, starting from 0.
- Original filename Main – enter image file name, exactly as file is named (including extensions – like .jpg or .png)
- Assign to option – enter 1 for those options which should be assigned to the image.

6. Example Product Structure
Refer to the example provided for clarity on how to fill in the columns correctly for a product that has 4 images. Ensure consistency in the product model and image details for each row.
- Product model – the same for each row (for each image).
- Default image – 1 for the first image and 0 for all other images (rows).
- Image status – 1 for all images (all enabled).
- Sort order – 0 for the first image, 1 for the second, 2 for the third, and 3 for the fourth image.
- Original filename Main – filenames of the images to a product.

7. Save the Updated File
Save the file with the updated image information.
8. Uploading Options
You have two options for uploading the images:
Option 1: Manual Import
- If you have a manageable number of products:
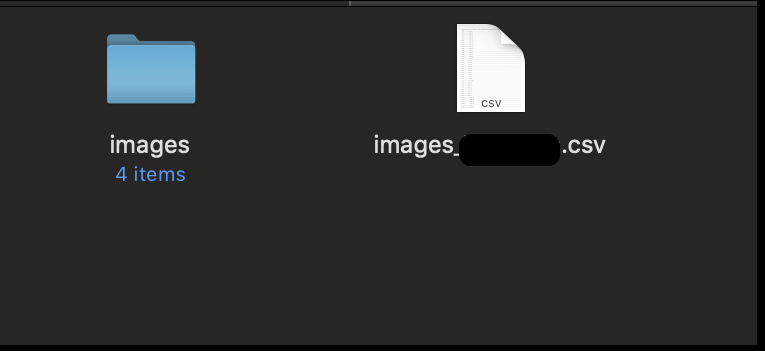
- Place the images and CSV file into a folder named ‘images’.
- Pack them together into one zip archive (file images.csv, and images folder should be placed at one level (images.csv file should not be in “images” folder)

- Visit the Manual Import tab at Easy Populate: https://www.your_web_site.com /admin/easypopulate?directory_id=2.
- Click “Choose File”, select the zip archive, and click “Upload”.

Confirm the correct fields from the CSV file and choose the appropriate import options: replace images for product or add to existing ones.

After this, the file will appear in the table below, where you need to click the green triangle button to start processing the images (assign them to products).
Option 2: Server Upload
- If dealing with a large number of images:
- Upload the images directly to the server following the path shown on the Easy Populate import tab: /home/your_web_site/public_html/ep_files/manual_import/images/.
- Only upload the CSV file prepared in the previous steps.
- Click the green triangle button to process the images.
You’ve successfully uploaded images in bulk for your products. Should you have any further questions, feel free to refer back to this guide or reach out for assistance.